
Carving with Laurie J.
Power Carving
November 2026
By Laurie J. McNeil
The Evolution of Power Carving: How Tech Changed Bird Carving
Bird carving has come a long way from its roots in utilitarian decoy carving. Over the decades, the craft has opened its doors to highly detailed, decorative sculptures—true pieces of art. While traditionalists started with knives, chisels, and axes, early creative carvers quickly realized they needed specialized tools to push the boundaries of realism.
Some of these pioneer carvers even created their own tools. I heard of one who used shaped and sharpened paper clips attached to a wooden handle. The tip was held over a candle to heat it up just enough to score a few strokes of feather barbs before it had to be reheated. Imagine that tedious process!
Songbirds, shorebirds, raptors, waterfowl, and seabirds all share one defining feature: soft, intricate feathers. The hard, straight edges of knives and chisels make it incredibly difficult to duplicate those delicate textures. While traditional tools remain historic and effective for rough outlines, the introduction of flexible shaft power tools—like Foredom and Dremel units—completely revolutionized the art form.
Finding My Tool: From Utility Knives to Flex Shafts
When I first started carving, I used a sheetrock knife. Then I bought a few chisels and a tupelo knife. Every single one required constant sharpening. I even took a professional course to learn how to keep my edges honed. I did well in the class, but I absolutely hated the constant downtime spent at the stone and on the strop. That was my turning point; I knew I needed to switch to power carving.
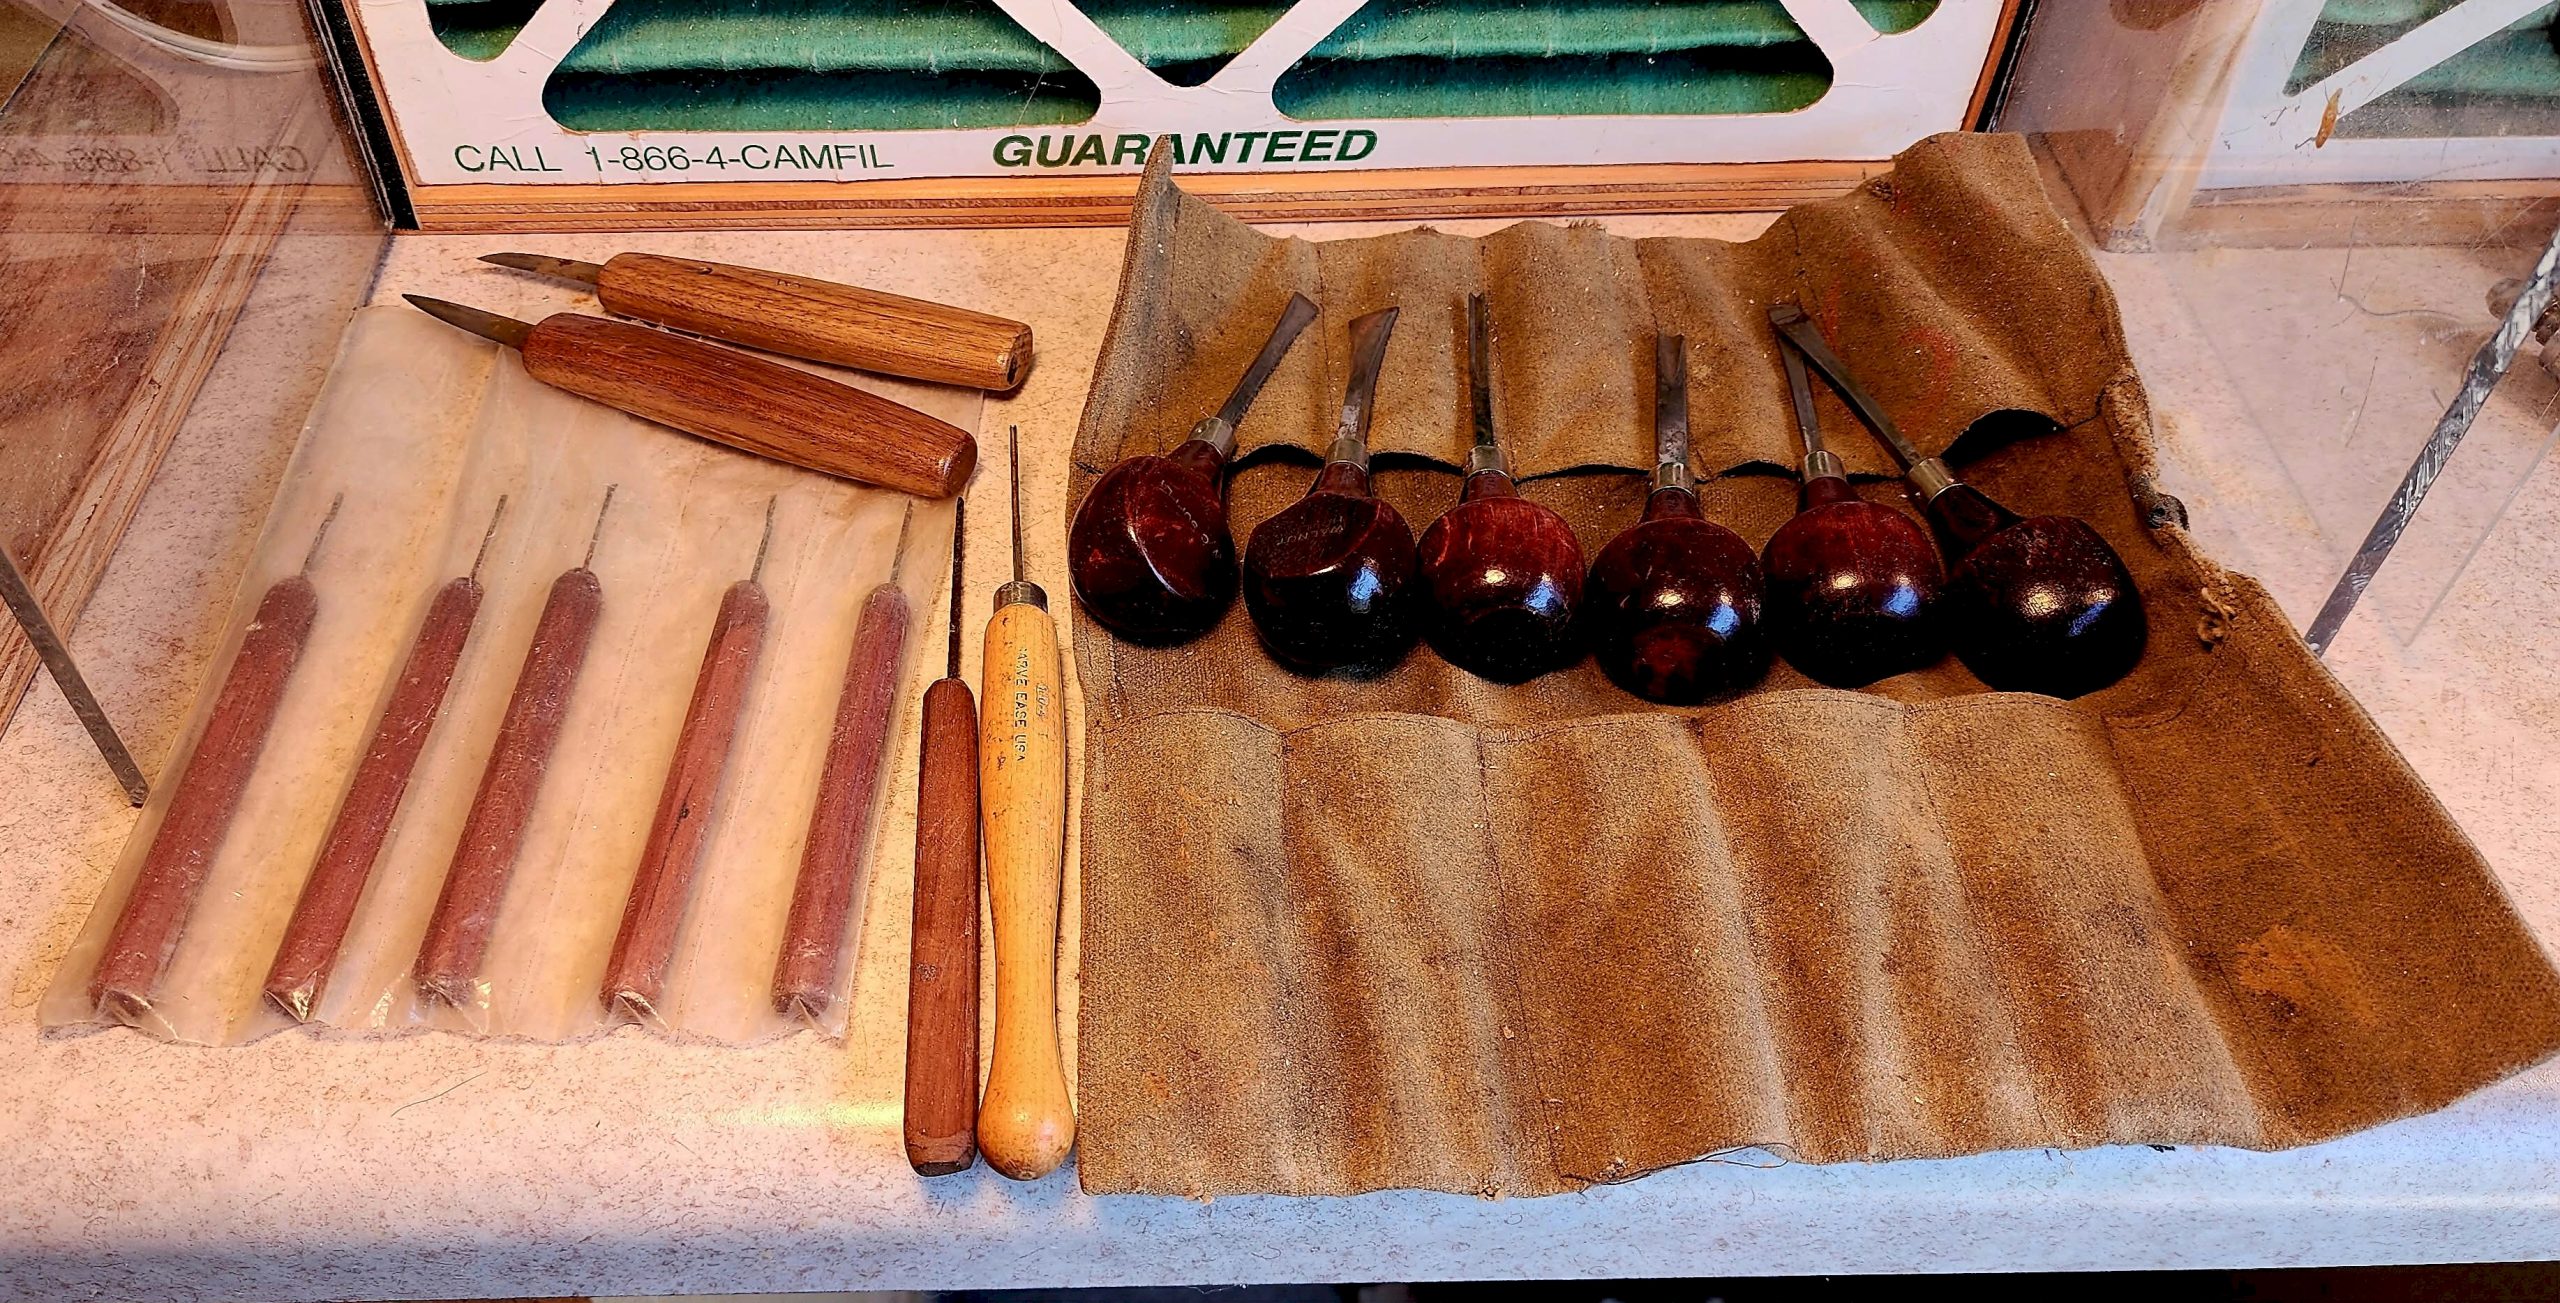
[Chisels and Knives used from 1985-1986]
Shortly after, I saw an ad in Wildlife Art Magazine for workshops at Salisbury University in Maryland, hosted by the Ward Foundation. At the time, my favorite carvers were Jett Brunet and Pat Godin. I used to marvel at photos of their winning pieces from the 1985 World Championships featured in Tricia Veasey’s book Championship Carvings, wishing I could carve like them.
You can imagine my excitement when I discovered Pat Godin was offering a workshop to power carve a 3/4-size Canvasback hen from tupelo wood. Pat instructed us to contact Curt Fabre at Curt’s Waterfowl Corner, who supplied everything on our class list.
To fund the trip, tuition, and supplies, I spent six months teaching classes and selling my own carvings. That single workshop taught me the foundational basics of power carving, detailing with Foredom and Dremel tools, and selecting the right bits. Most importantly, it introduced me to the king of power-carving woods: tupelo.
The High-Tech Shift and Managing Dust
In 1986, I attended my first Ward World Championships. The venue was packed with vendors and carvers, many of whom were transitioning to power tools. At that time, the only micro-motor tool on the market was the Gesswein. While you could achieve fine detailing with a Foredom, its heavy, rigid flexible shaft was difficult to control. Unfortunately, only champion carvers could afford the Gesswein’s $900 price tag back then, leaving me to use a flex-shaft Dremel for my fine details. Over the years, micro-motors became widely accessible, eventually dropping to an affordable entry point of around $250.
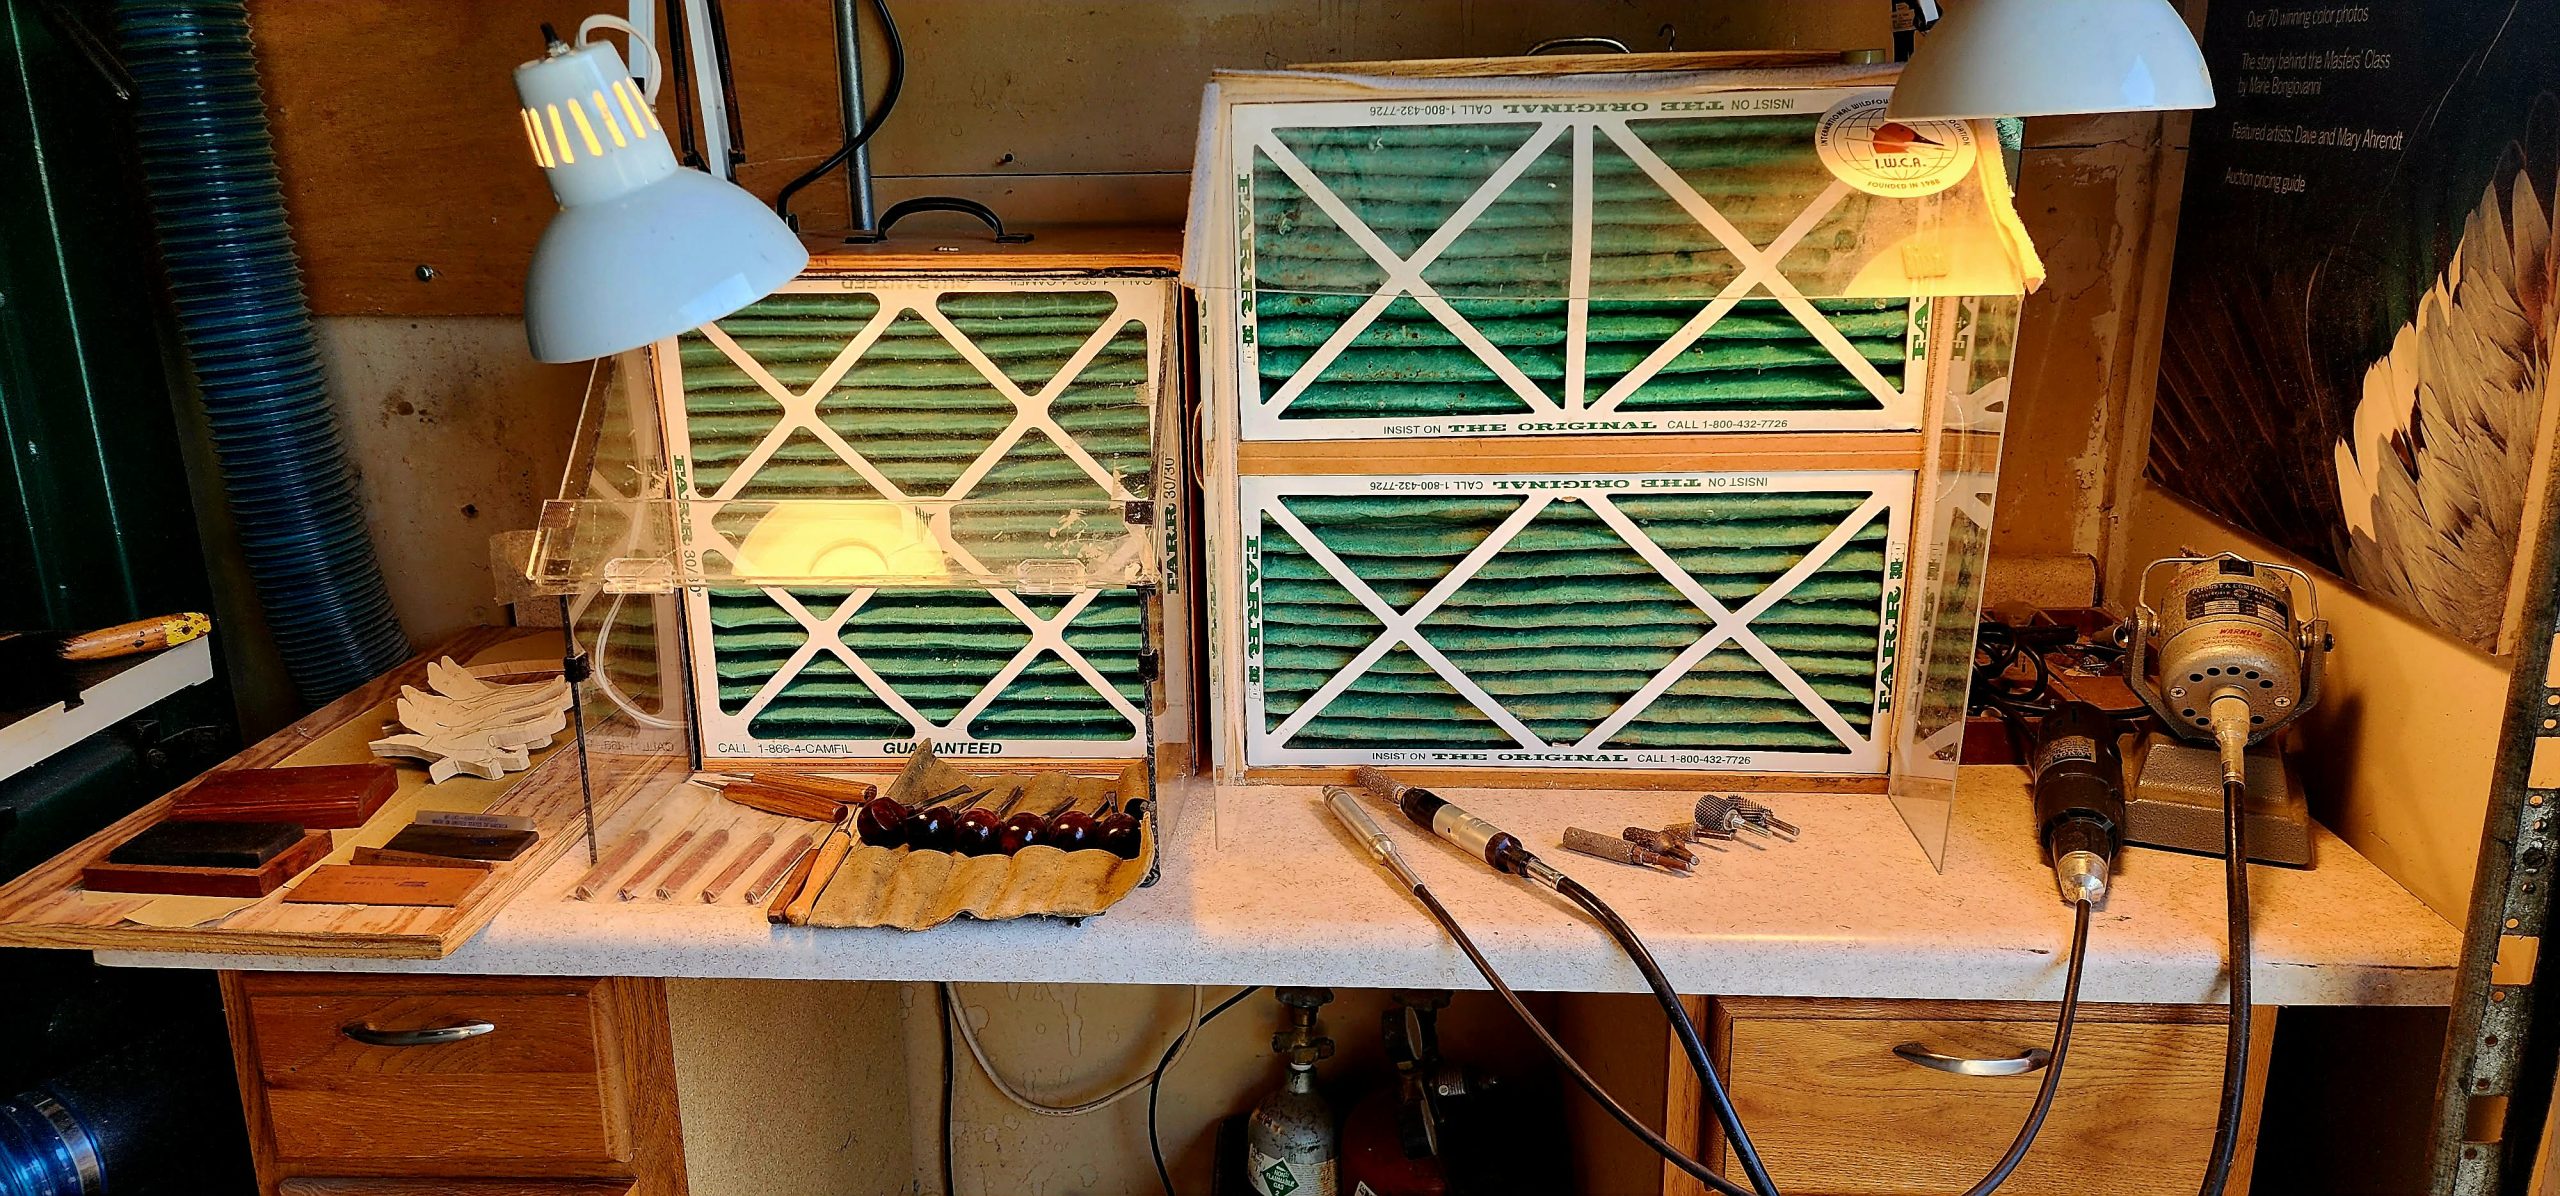
[Double Stacked Dustsucker from 1992 on the right, unit on the left is an original Tornado 1000 from 2011. Dremel Flex-shaft and Pfingst Flex-shaft tools, knives and chisels, sharpening stones and tools.]
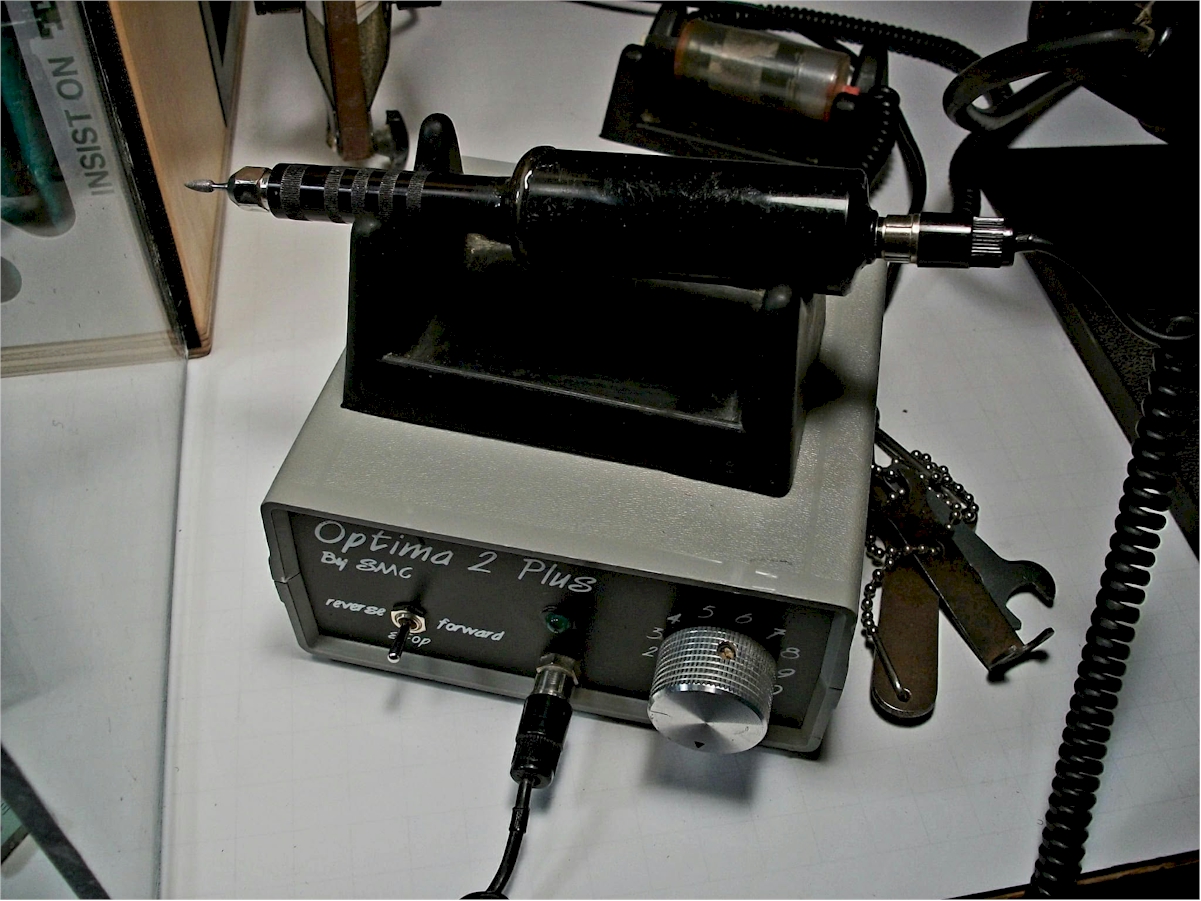
[The Optima 2 Plus Micromotor by SMC Enterprises. 1990-2011]
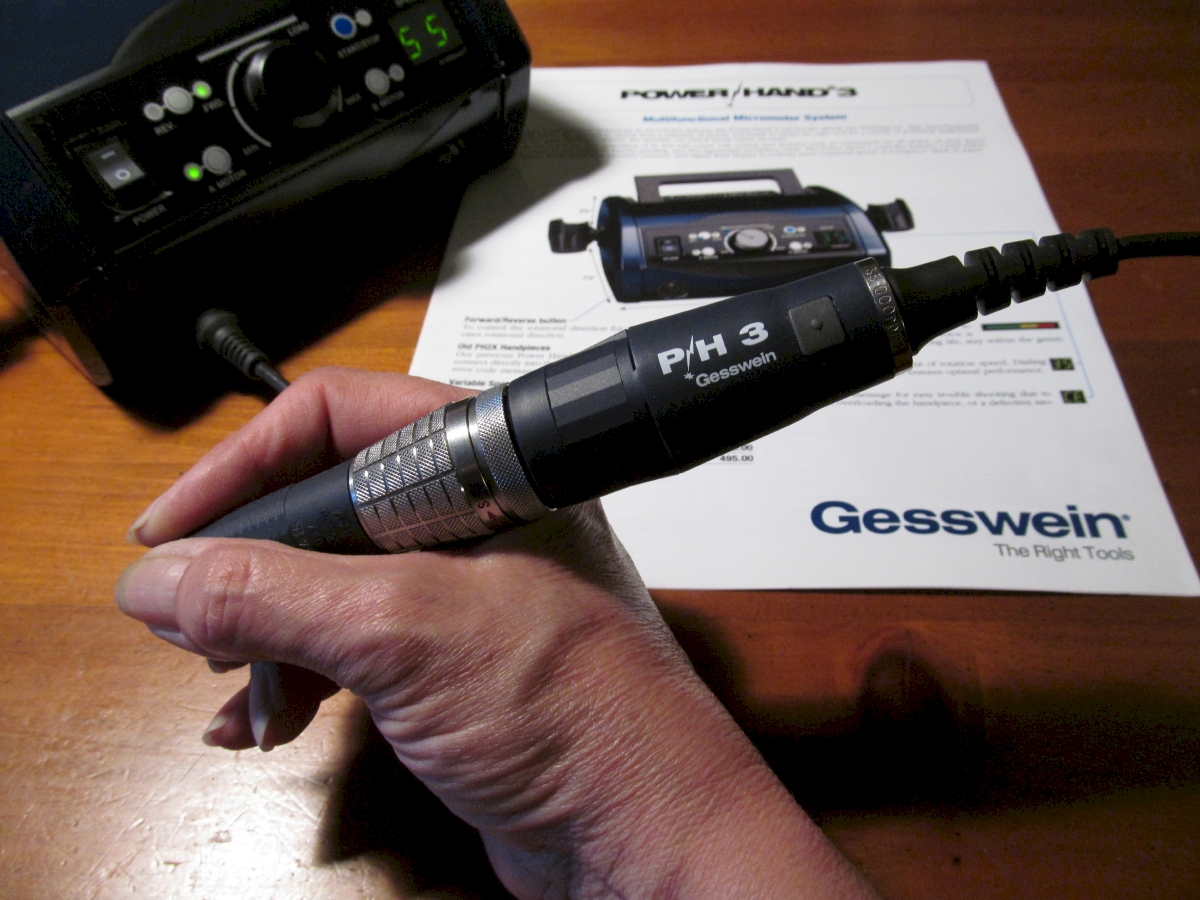
[Gesswein Power Hand 3 50,000 RPM Handpiece and Power Station – 2011 to present]
However, power carving brought a massive new challenge: dust. Power carving indoors during hot, humid 1980s summers was brutal. I had to wear coveralls, a heavy respirator mask, and a baseball cap just to rough out pieces. I would end up buried in piles of sawdust, requiring an immediate run to the shower.
Inhaling power-carving dust can be hazardous. I have been told that when magnified, tupelo wood dust resembles sharp shards of glass. Consequently, the dust not only damages your lungs, but it can also cause microscopic cuts inside your nasal passages if inhaled.
While respiratory protection is essential, traditional respirators can be cumbersome and block your downward line of vision. A NIOSH-approved N95 mask is excellent for filtering out at least 95% of airborne dust particles during everyday tasks like sweeping or manual sanding, but a dust mask alone is not enough for heavy power carving.
The first dust collector available in 1986 was a massive, expensive, underpowered floor unit that required you to stand directly in front of it. In 1987, SMC Enterprises introduced the "Dust Sucker," a highly efficient desktop alternative.
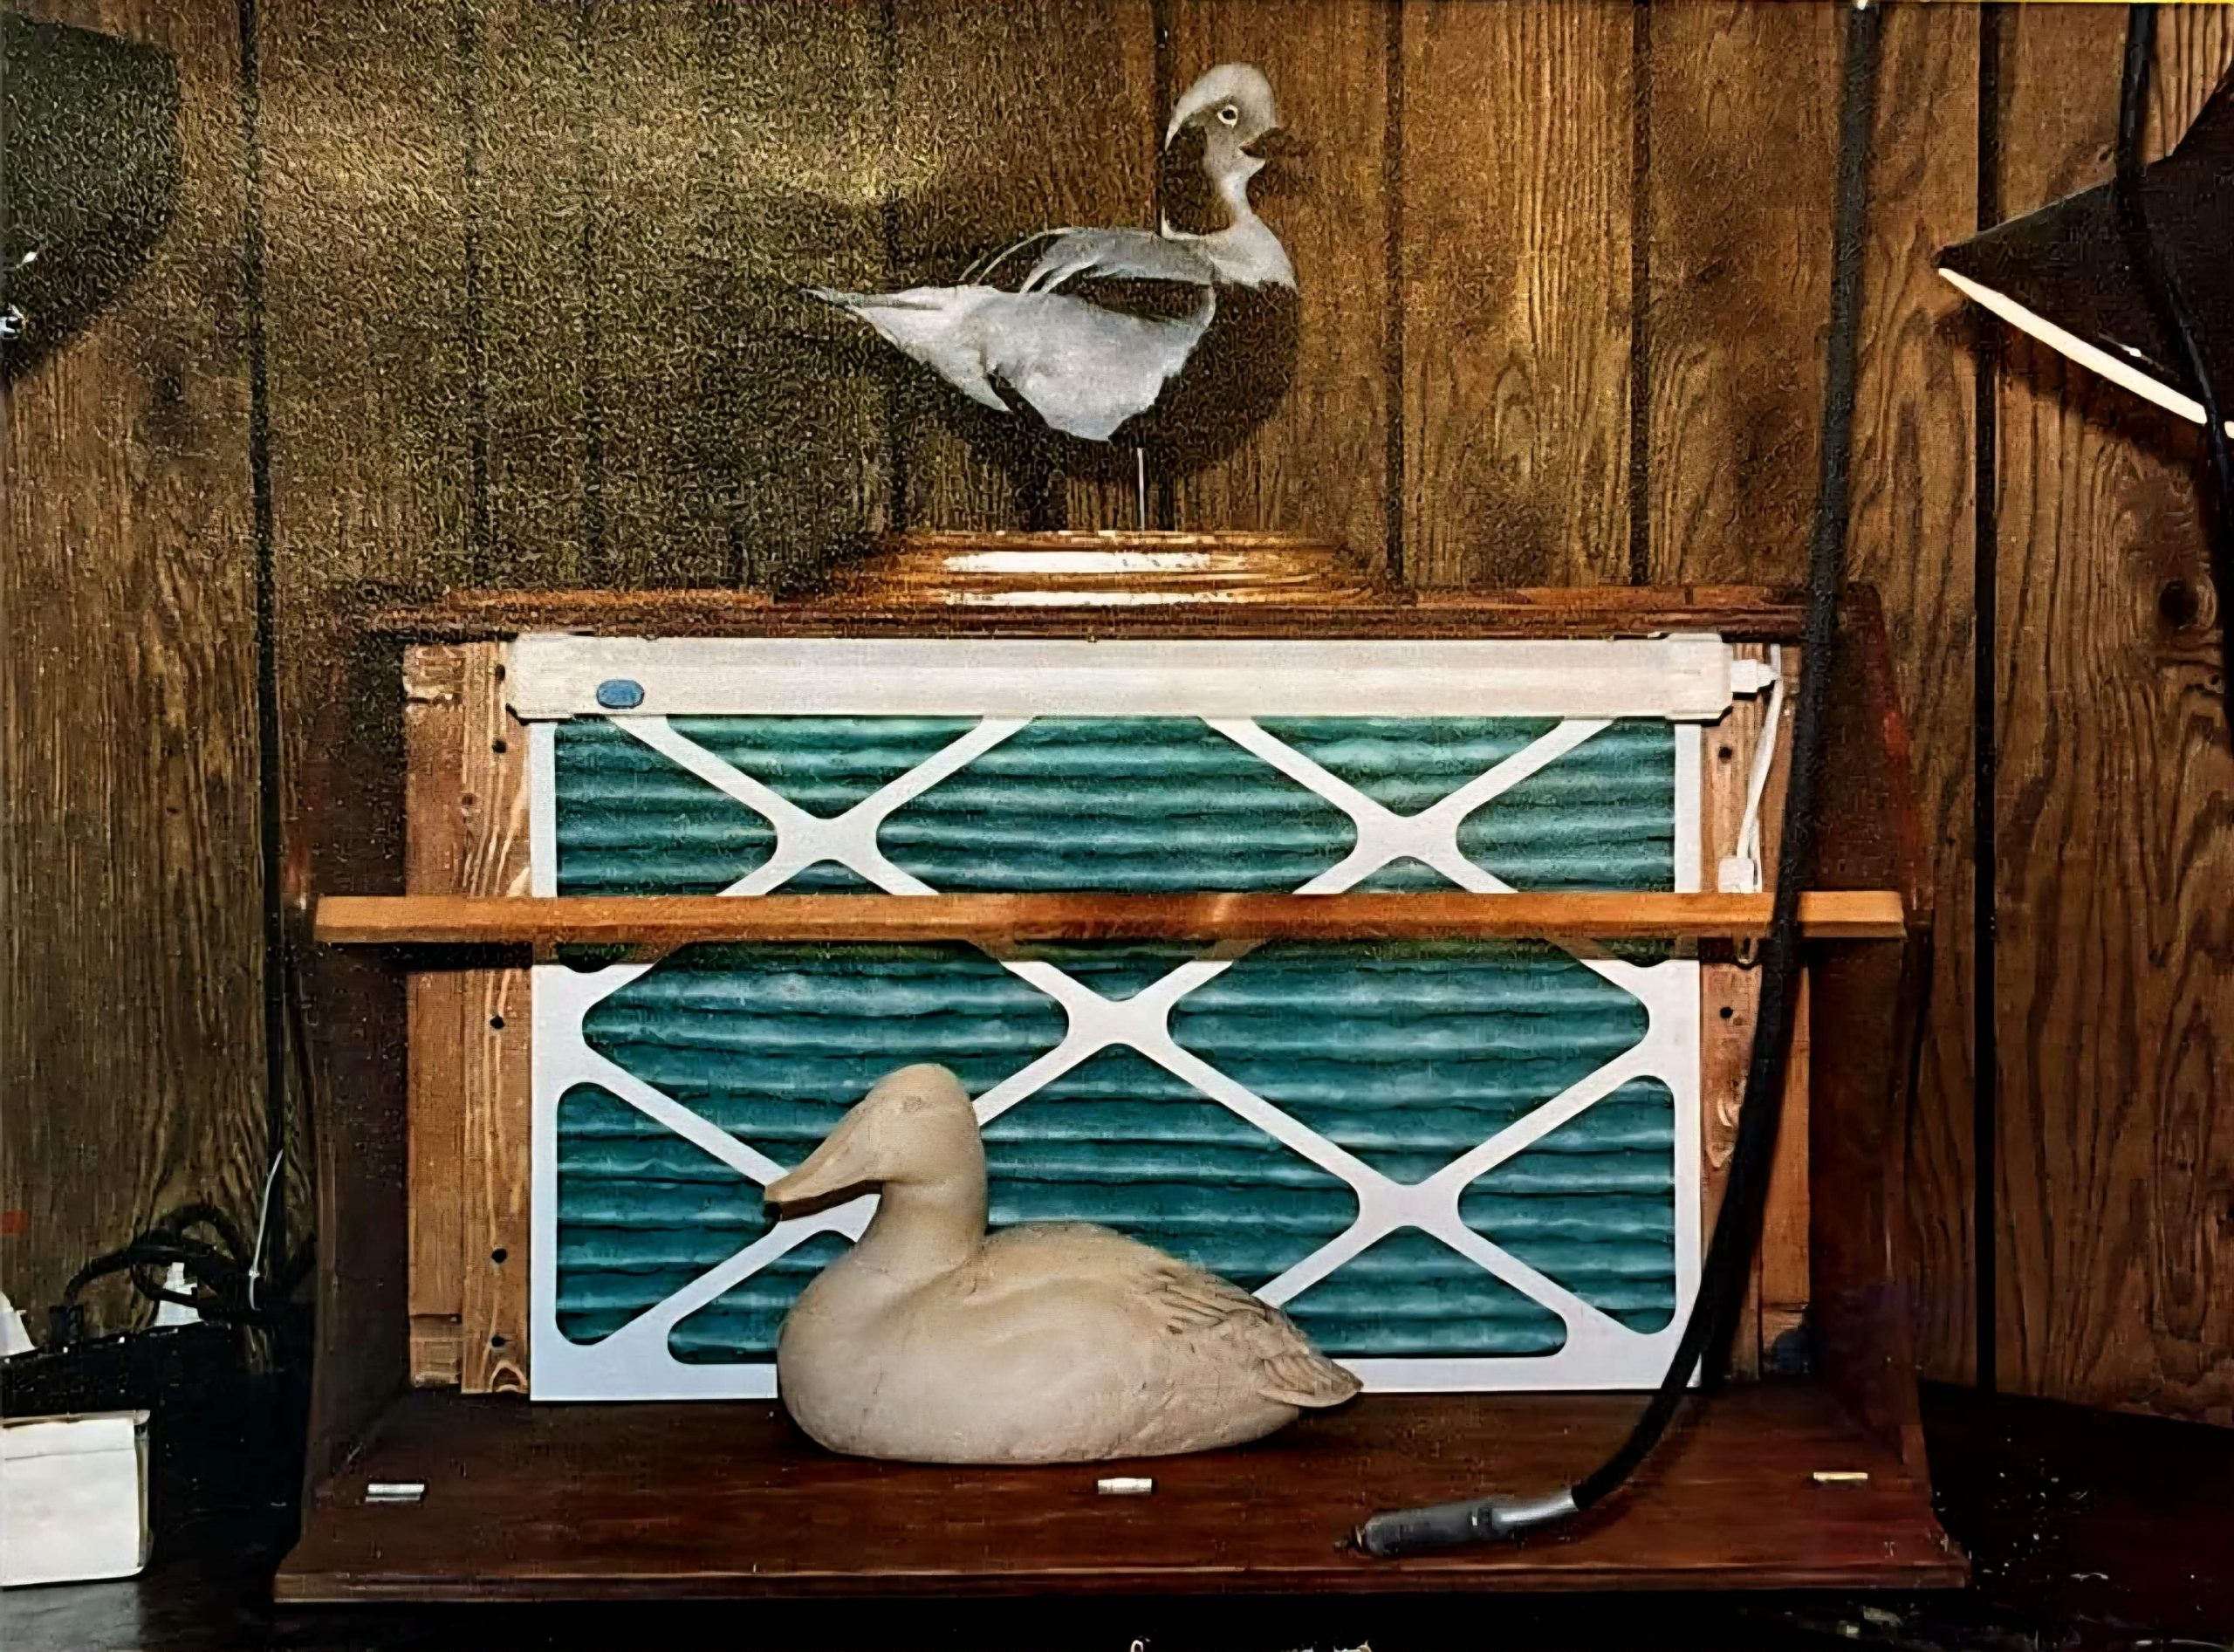
[Original Dust Sucker 1987 (Photo by SMC Enterprises)]
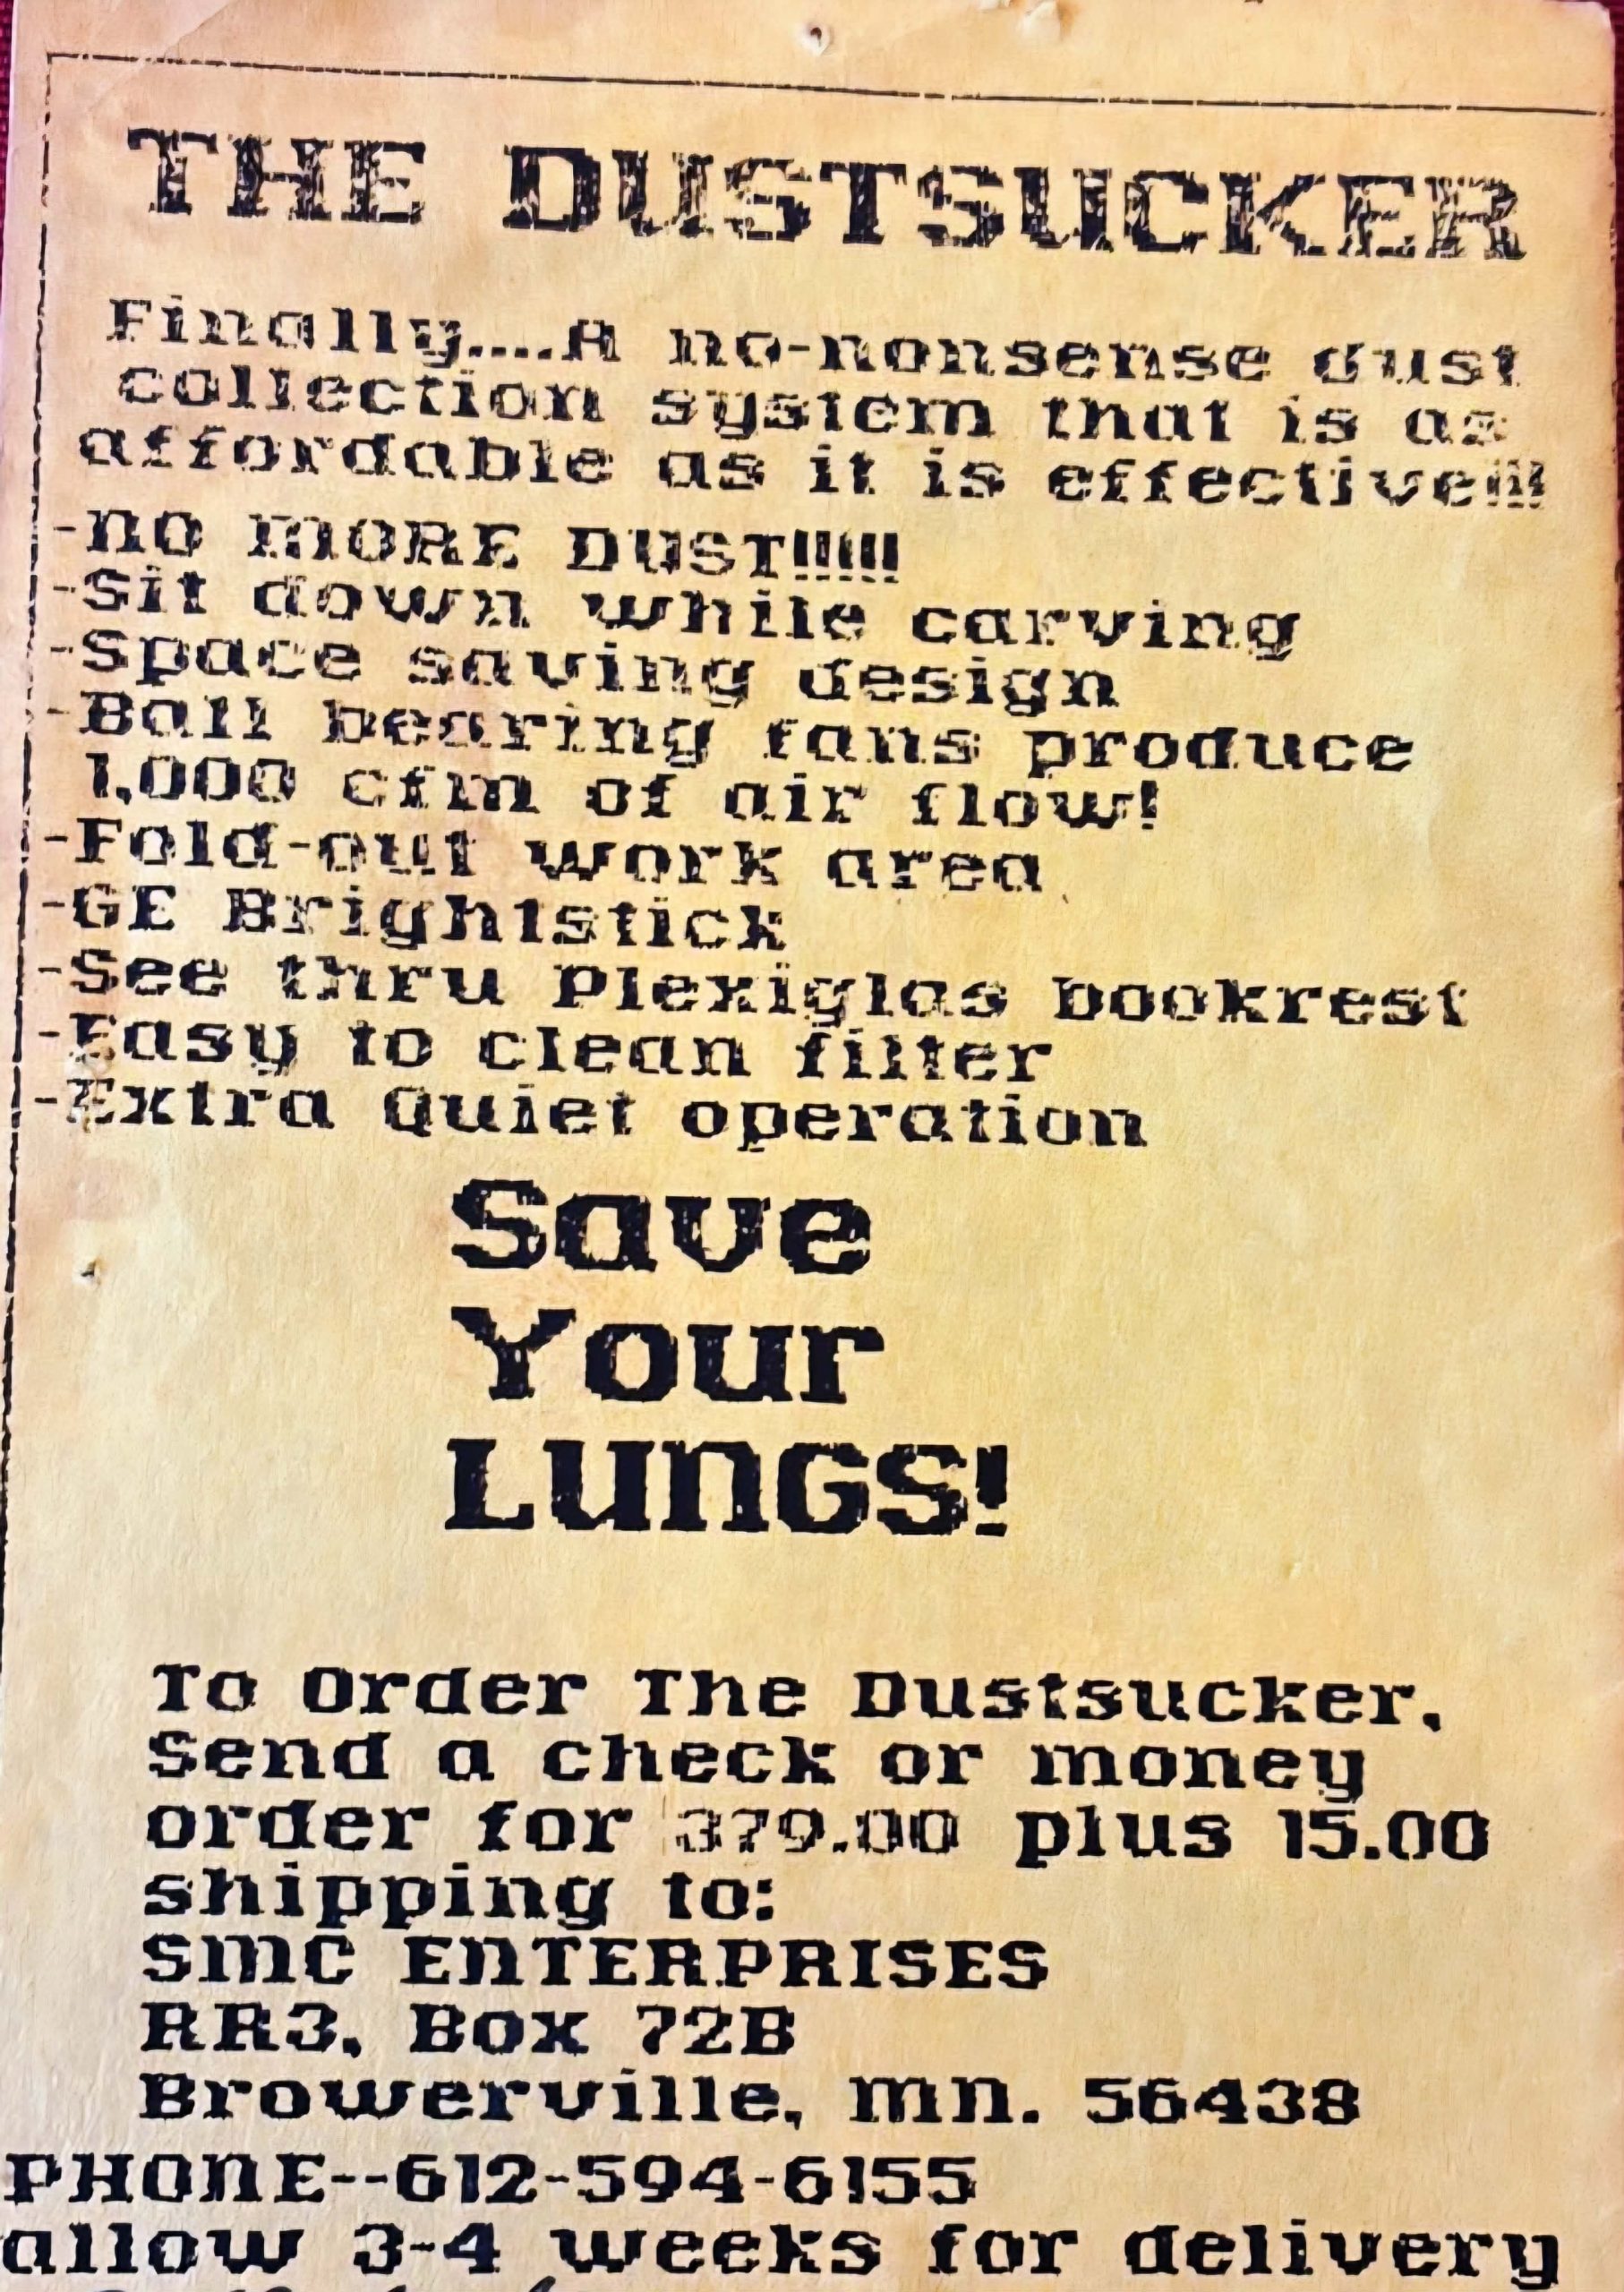
[Original Ad for the Dustsucker 1987]
Today’s evolved model, the Tornado 1000, is a true game-changer. It allows me to carve right inside my studio—which doubles as a game room—while keeping my pool table completely dust-free. I still wear a mask when roughing out my carvings just to be safe. By the time I am carving fine feather groups, I can remove the mask and rely entirely on the Tornado for dust collection.
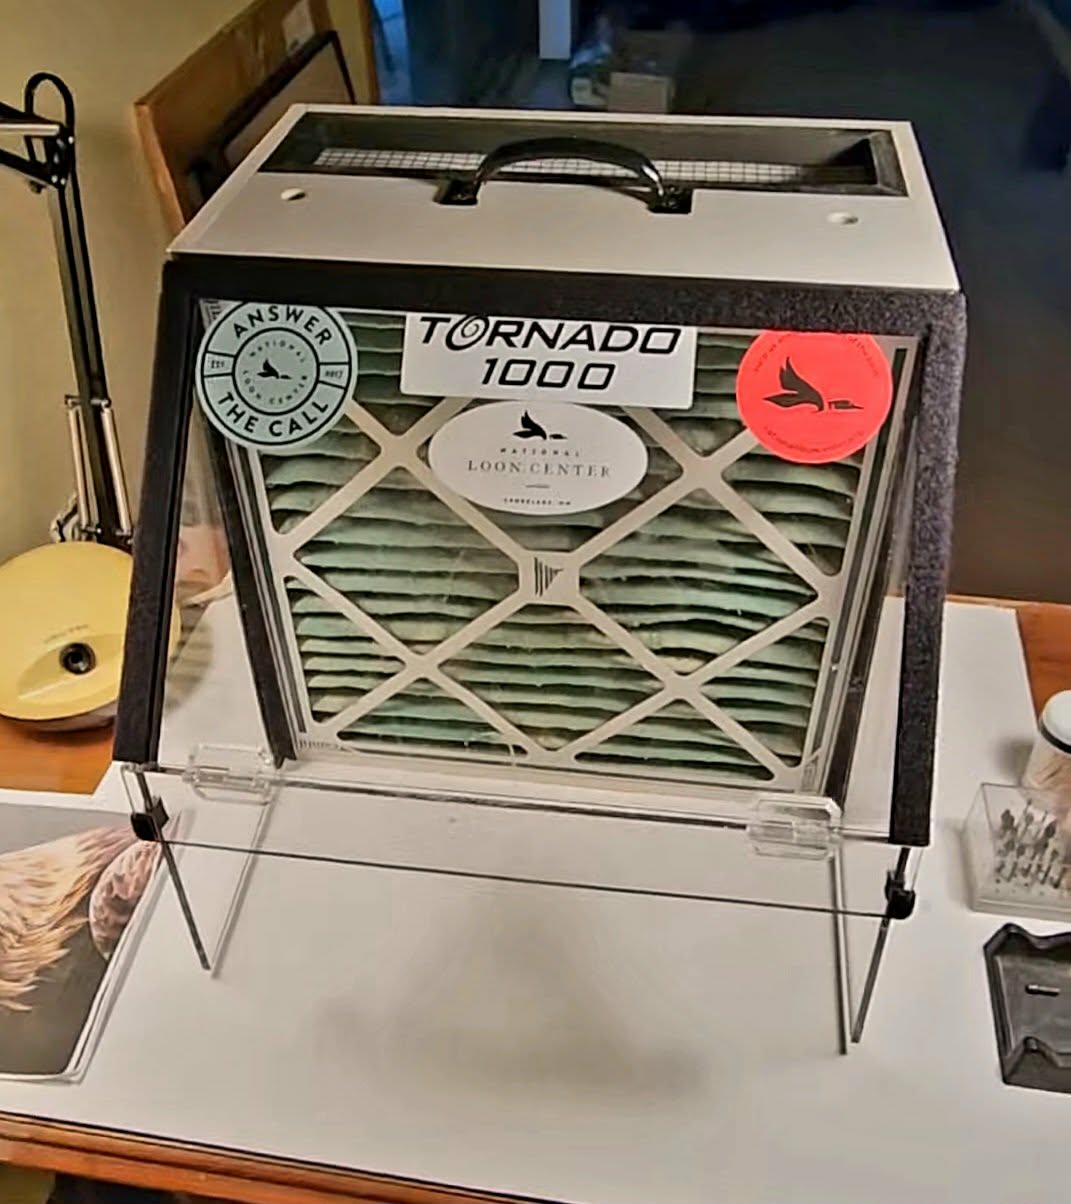
[Tornado 1000 – 2026 1000 CFM – The most powerful desktop dust collector on the market $470]
Choosing Your Medium: Wood Selection
Not all wood species react well to power tools. Choosing the wrong wood can ruin your tools, compromise your project, or jeopardize your health.
- Exotic Hardwoods & Toxic Softwoods: Exotic tropical hardwoods like rosewood and cocobolo, as well as allergenic softwoods like western red cedar, contain powerful natural toxins or resins. These can severely irritate or permanently damage respiratory tissue. They should never be power carved. Retailers like Rockler and Woodcraft offer beautiful exotic woods, but always verify a species' toxicity rating before purchasing it for power tooling.
- Basswood: This wood tends to "fuzz up" when power carved, requiring tedious abrasive cleanup afterward. It also produces a distinct, unpleasant odor under high-speed friction.
- Cherry & Black Walnut: These hardwoods are far too dense for standard carving bits. Without highly specialized equipment, high-speed friction will burn the wood grain and ruin your expensive burs.
- Butternut: A beautiful, forgiving wood that power carves smoothly. It is my absolute favorite choice for carving dynamic water-wave display bases.
- Tupelo: The ultimate wood for decorative bird sculptures. Its dust is structurally heavy, meaning it drops straight down into your lap or desktop collector rather than floating invisibly through the air. It holds fine details beautifully without splitting or fuzzing.
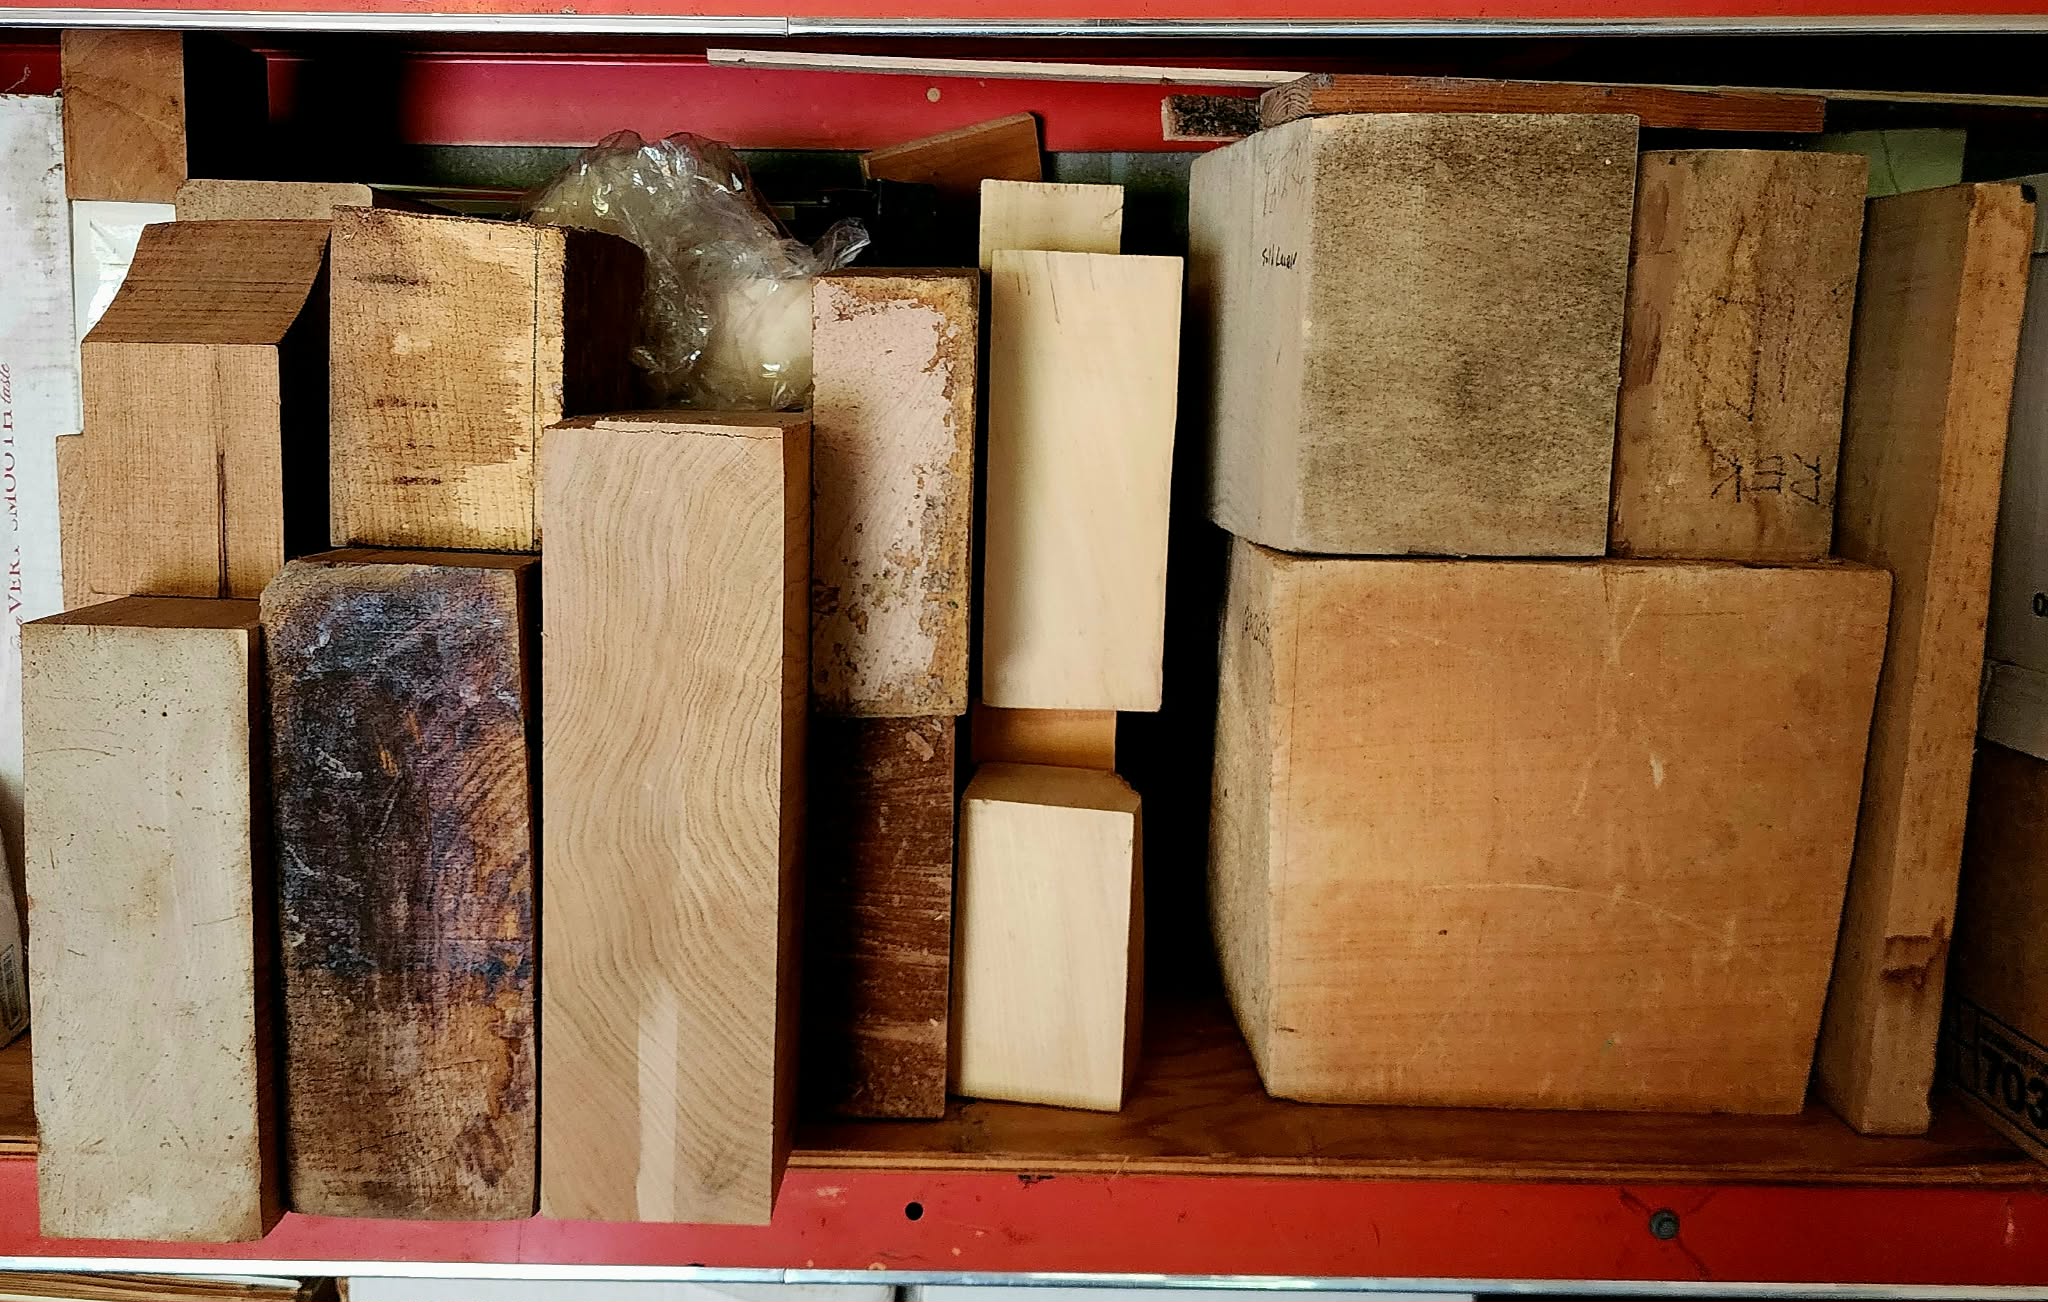
[Tupelo Flitches and Big Butternut Slabs]
A Professional Setup: Bits and Techniques
When preparing a wood block, I use a bandsaw to cut just outside my outer pattern line, leaving about an 1/8-inch of extra wood. High-speed rough-out bits can slightly tear wood fibers beneath the surface. Going over the entire piece afterward with a carbide cross-cutter removes this torn layer, ensuring a clean, stable surface that prevents major structural issues during fine detailing. As a bonus, it leaves a beautiful texture for drawing your guidelines with a pencil.
Recommended Bit Blueprint
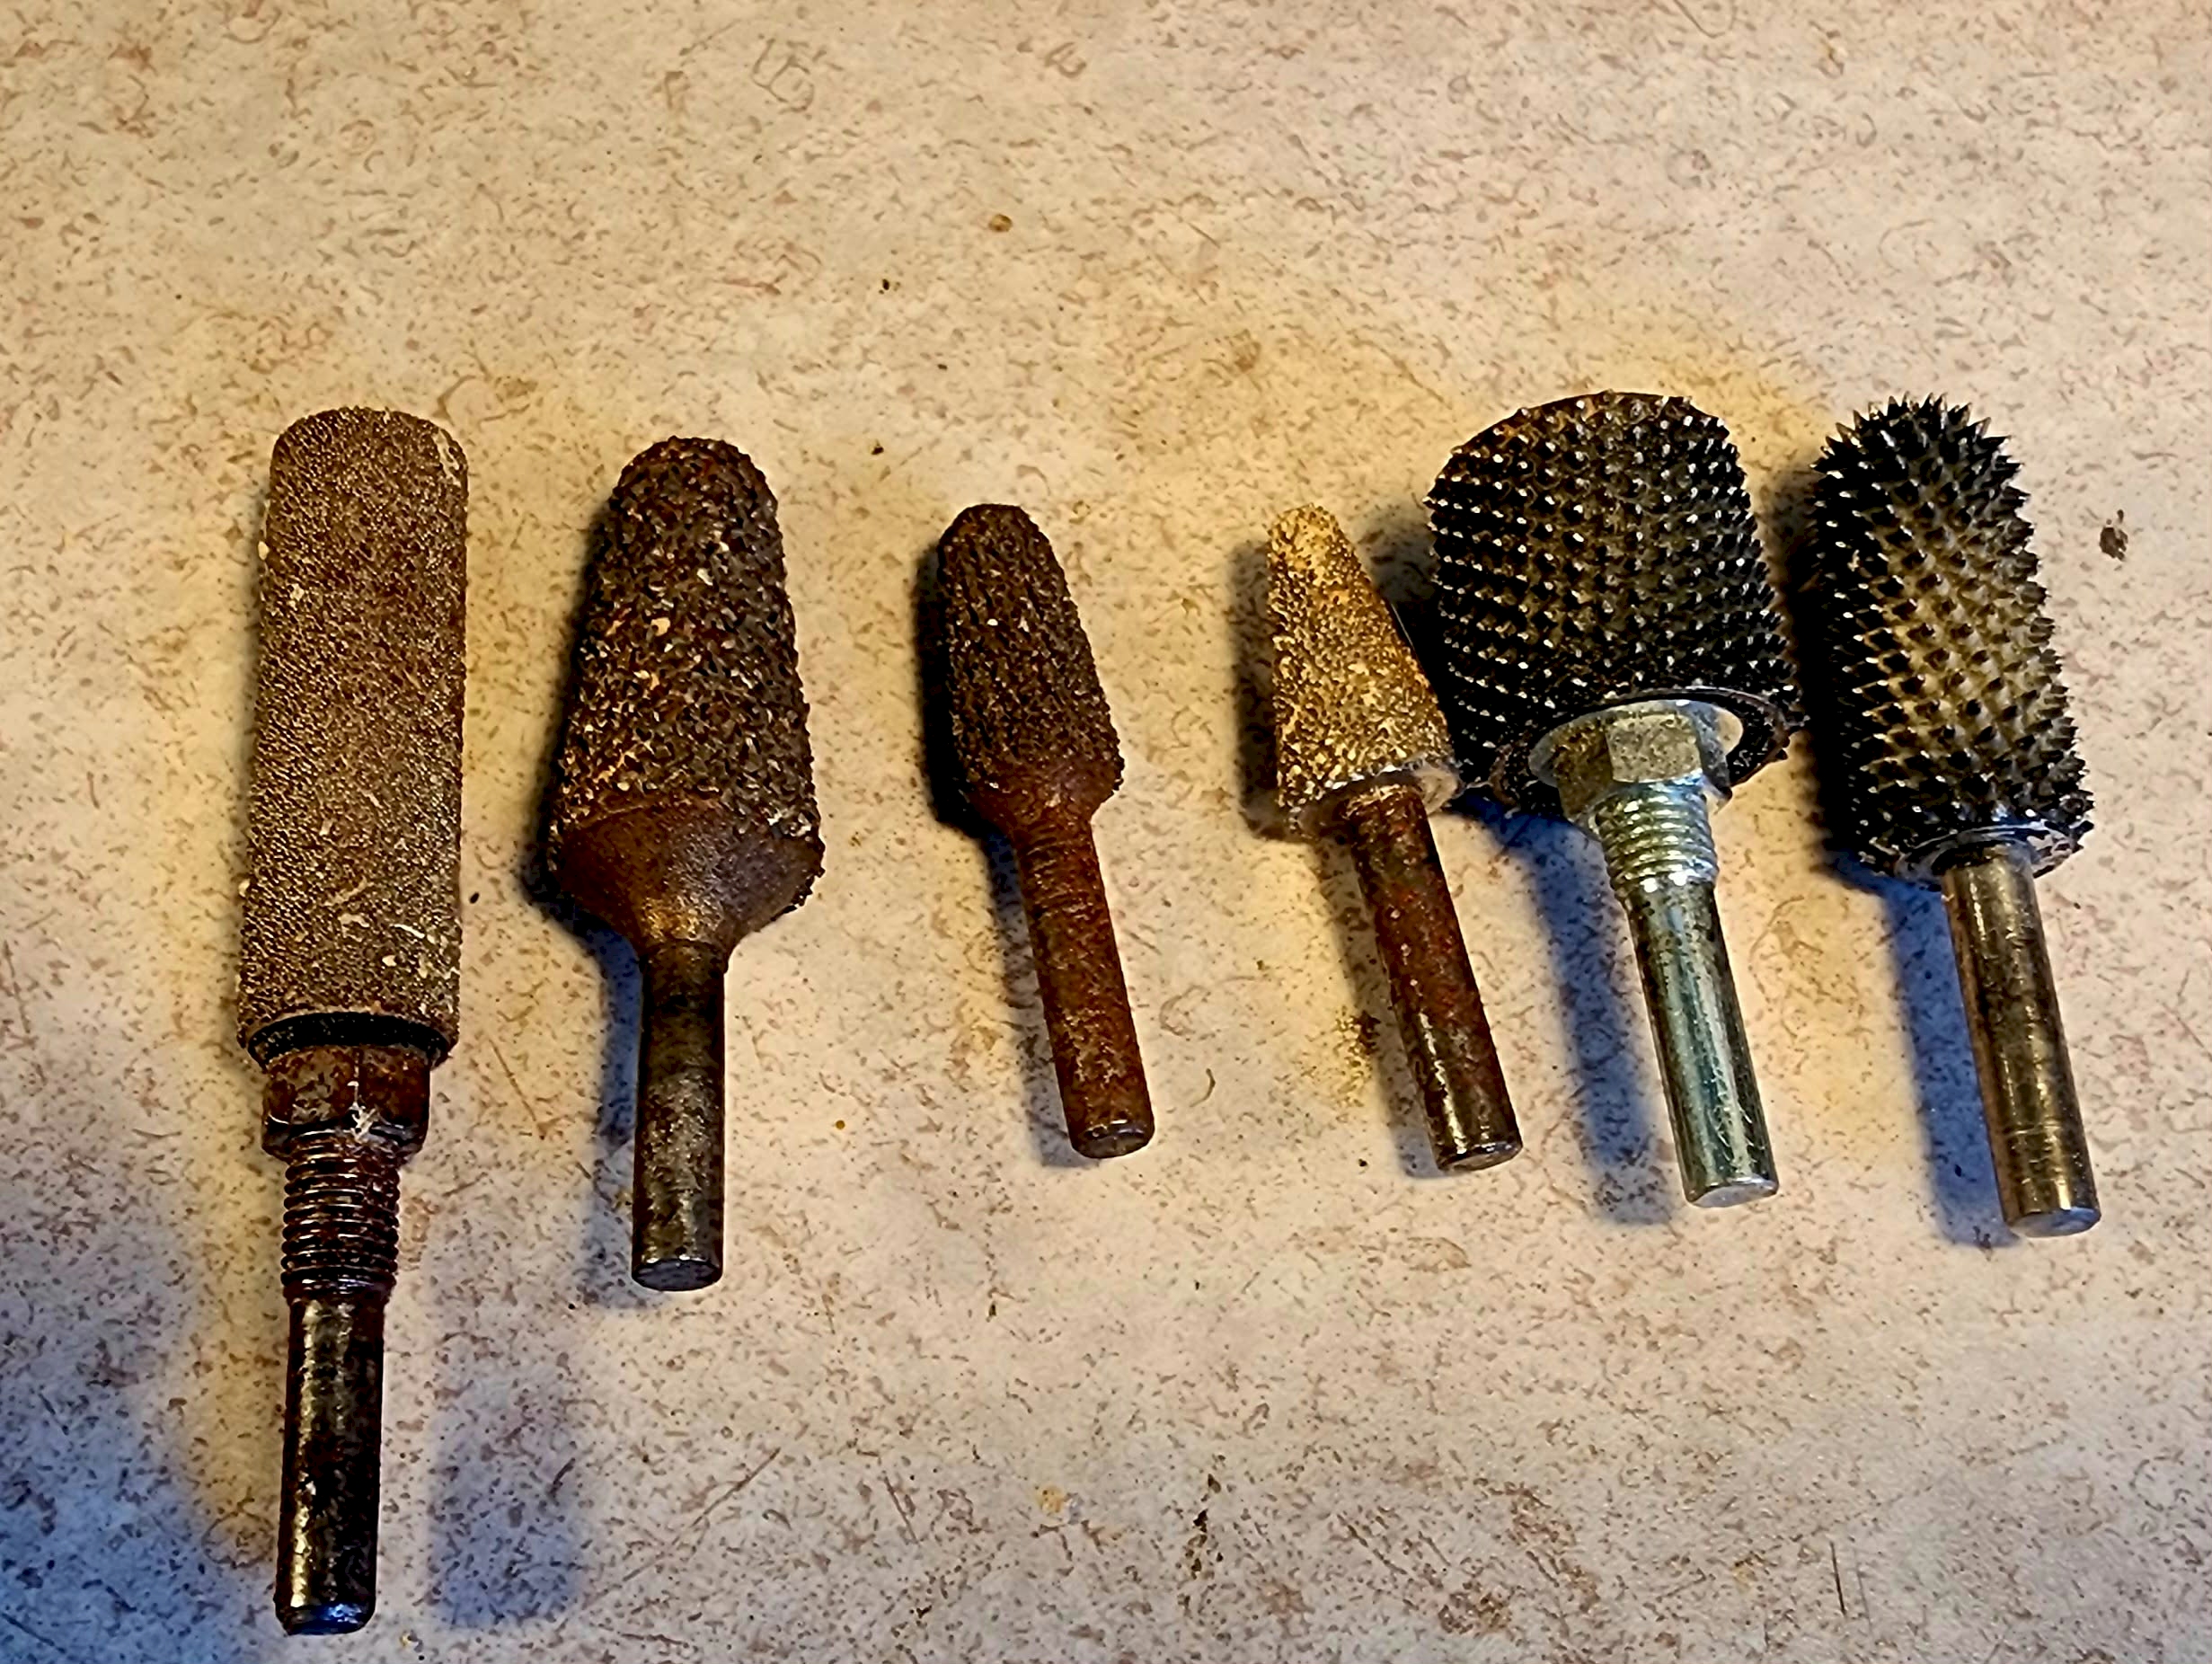
- For Roughing Out (Tupelo & Butternut): Use Carbide Kutzall 1/4" or 1/8" shaft burs. Tapered cone, sphere, or cylinder shapes work best (available in fine, coarse, and very coarse configurations). The 1/4" bits excel at roughing out to the round from a bandsaw blank, while cylinder shapes assist in carving clean 90-degree angles before the final rounding stage. Use 3/32" shafts for the same tasks on smaller-scale projects.
- For Feather Carving & Shaping: Pair a 3/32" bud-shaped carbide cross-cutter with a 3/32" diamond flame bit. Bud-shaped cross-cutters (or stump cutters) quickly remove bulk wood, smooth out surfaces, and erase scars left by heavy Foredom rough-outs. For the diamond flame bit, a long, slender flame profile is generally preferable to a short, squat one for mapping out feather groups and bills. Use a small sphere or cylinder diamond bit for custom-fitting glass eyes.
- For Fine Detailing and Texture: Use a 1/16" or 3/32" White Arkansas (aluminum oxide) tapered stone cone to establish crisp feather layouts before burning individual feather barbs and quills. These cones are excellent for creating organic feather barb flow and can be redressed on a sharpening stone to keep their edges sharp.
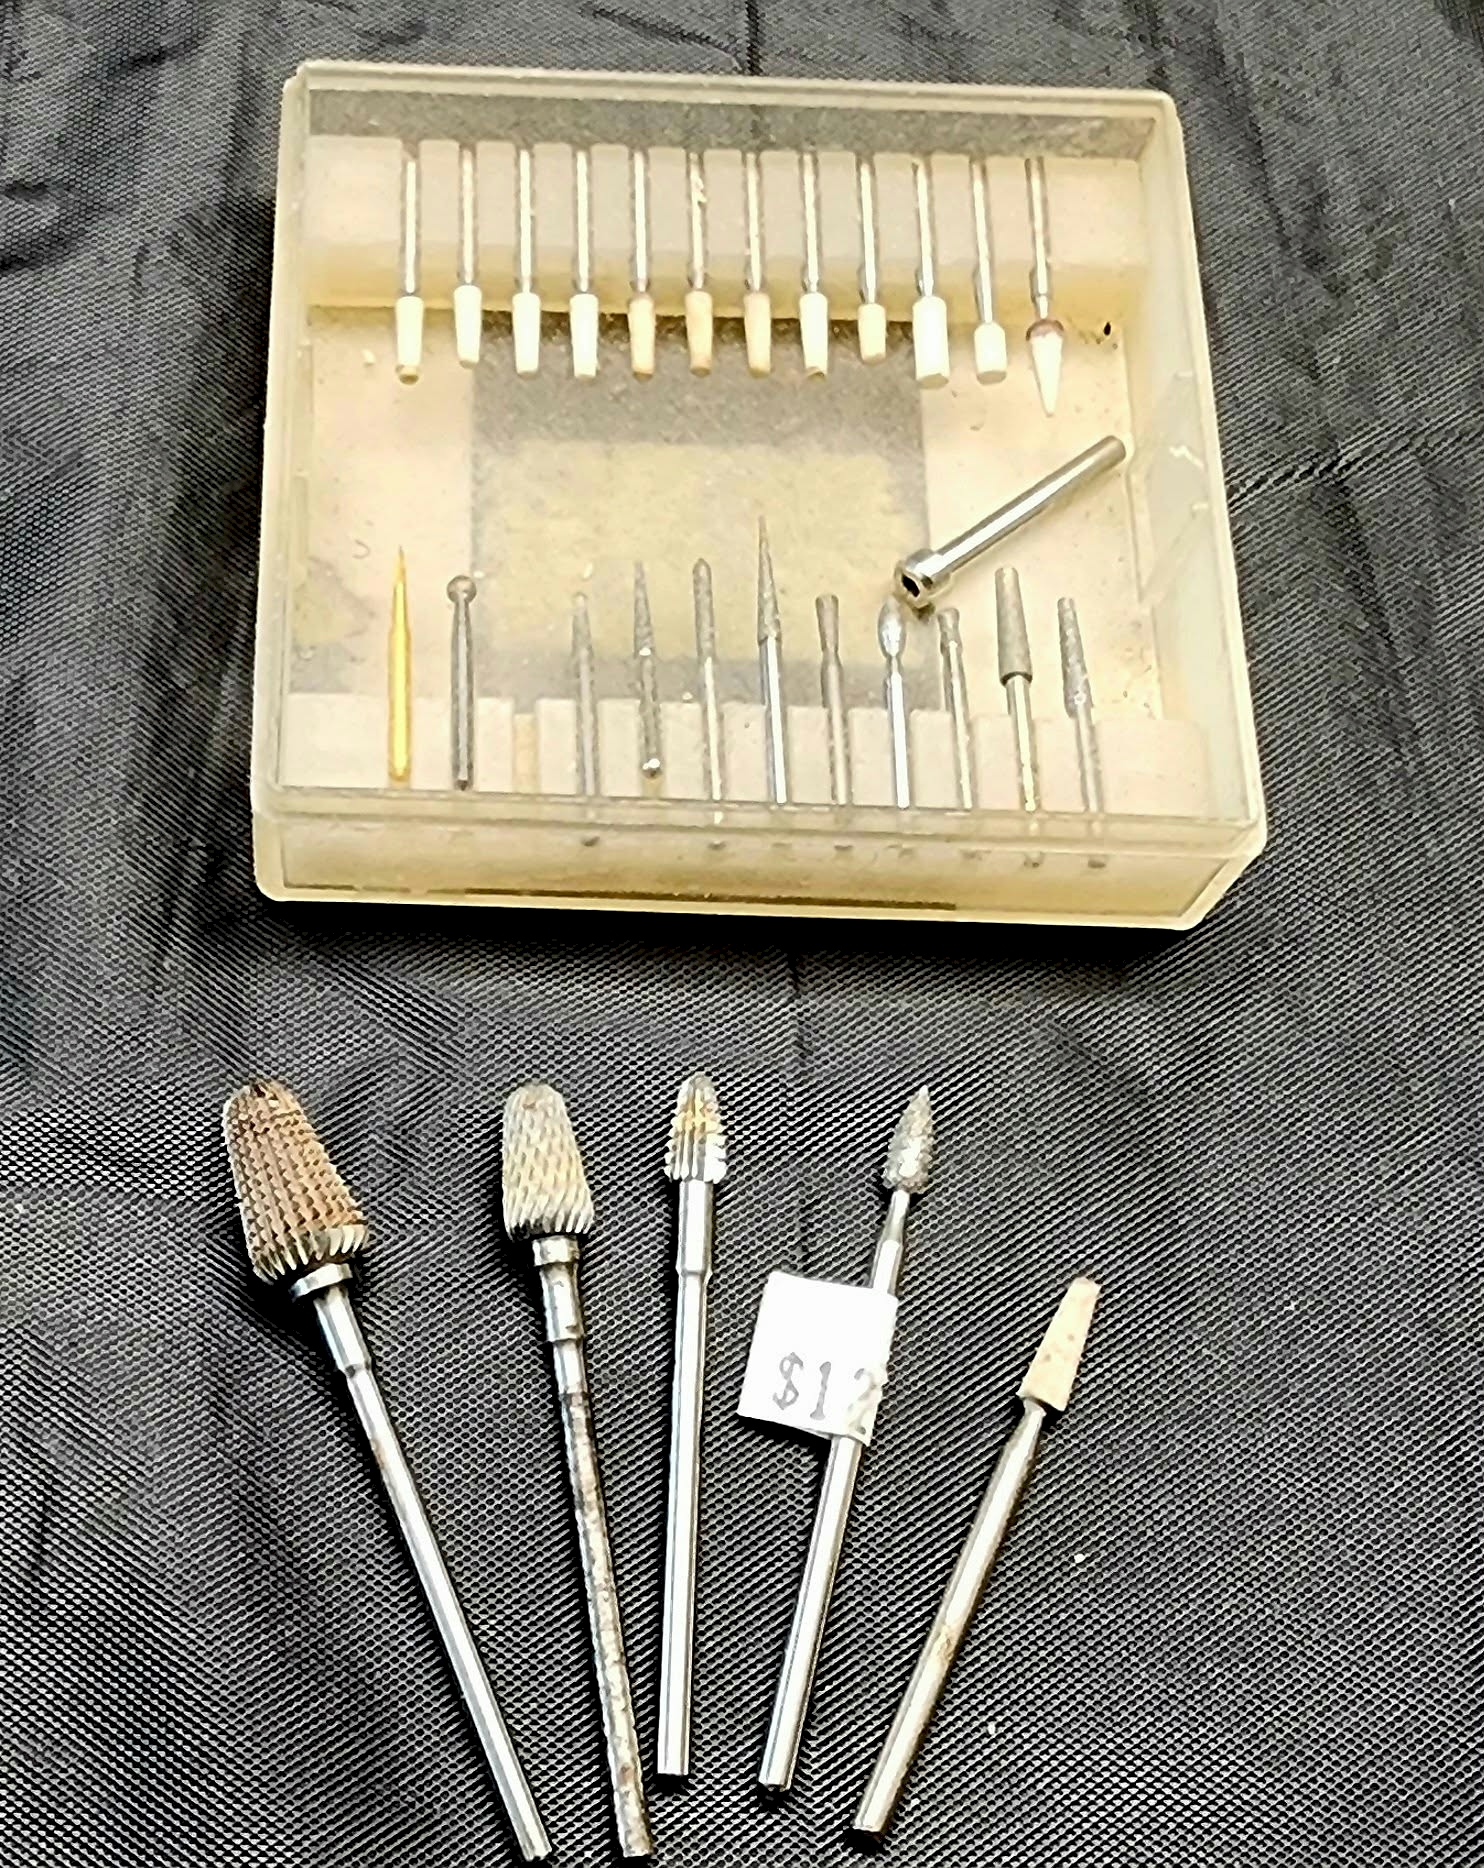
[Top Row is a 1/16” Set of Diamonds and Aluminum Oxide FG Tapered Cones for Texturing, along with the reducing collet 3/32”-1/16”. Second Row are three 3/32” carbide cross-cutters]
Pro-Tip: Small 1/16" shaft diamond bits and Arkansas stones can be tough to find through traditional carving suppliers. Look for them on wholesale dental websites like Net32.com. Search for "FG" (Friction Grip) diamond bits and Dura-White TC1 aluminum oxide tapered cones. You may have to buy them in packs of 10 or 25, but the precision control is well worth the investment.
Protecting Your Hearing
The constant whine of a flex-shaft or micro-motor, combined with the steady hum of a dust collection system, is a recipe for noise-induced hearing damage. I suffer from a bit of tinnitus myself, which I attribute to unprotected power carving in my early years.
Several years ago, I began wearing wireless, over-the-ear Bluetooth headphones while working. Models like the Skullcandy Hesh 3 are comfortable enough to wear for hours without noticing them. They effectively filter out the abrasive noise of the dust collector and power tools, allowing you to listen to music or an audiobook while you carve. Simple foam earplugs can also do the job, though they tend to be less comfortable during marathon carving sessions. Whichever style you prefer, get into the habit of using hearing protection every time you power up your tools. We only get one set of ears.
In my next column, we will dive deep into the unique characteristics of tupelo wood. We will cover how it is harvested, the structural differences between sections of the tree, where to source high-quality blanks, and how to properly store and prepare it for your next project. In the meantime, keep carving!